

Table of Contents
- Why Graphic Tees Fade and Crack (and How to Stop It)
- Step-by-Step: How to Wash Graphic Tees Correctly
- The Best Water Temperature for Washing Graphic Tees
- Choosing the Best Detergent for Graphic Tees
- How to Dry Graphic Tees Without Fading
- How to Remove Stains From Graphic Tees
- Care by Print Method and Fabric Exceptions
- Common Mistakes That Damage Prints
- Frequently Asked Questions
Last Updated: October 18, 2026
Why Graphic Tees Fade and Crack (and How to Stop It)
The print on a graphic tee fails for one reason: friction and heat.
Here's the good news. You don't need special equipment. You need cold water, a gentle cycle, and the patience to air-dry.
Most guides get one thing wrong. They treat all prints the same.
Below, we'll walk through seven steps, from turning the shirt inside out to storing it properly.
Step-by-Step: How to Wash Graphic Tees Correctly
Washing a graphic tee correctly takes seven steps. Each one reduces friction or heat, the two forces that fade, crack, and peel printed designs.
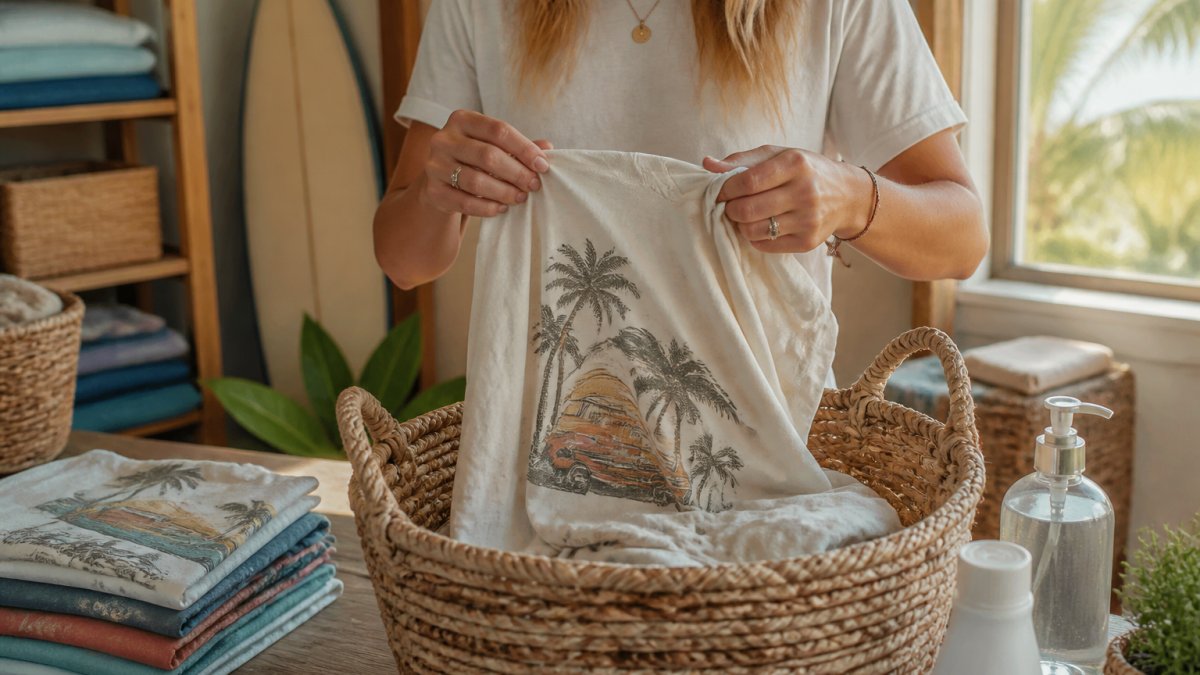
- Turn the shirt inside out. This puts the printed design against itself, not against zippers or buttons.
- Check the care label. It lists the maximum water temperature and whether machine washing is safe.
- Sort by color and weight. Keep graphic tees away from heavy denim and towels that rub.
- Use a mesh laundry bag. A bag adds a layer of protection in the machine.
- Choose cold water and a gentle cycle. Both cut friction and heat.
- Use a mild detergent. Harsh formulas strip color.
- Air-dry. Skip the dryer entirely when you can.
Turn It Inside Out First
Turning the shirt inside out is the single most effective habit. The printed design no longer touches other garments during the wash. Friction drops, and the print keeps its edges.
Do this before the shirt goes anywhere near the machine. It takes five seconds.
Sort and Load With Care
Keep graphic tees in a separate laundry load when possible. Heavy items like jeans and towels create friction that wears prints down. Wash tees with light items: other shirts, soft cotton, and delicates.
Don't overload the drum. A crowded machine rubs fabrics together harder. Leave room for clothes to move.
The Best Water Temperature for Washing Graphic Tees
Cold water is the best water temperature for washing graphic tees. Set your machine to 30°C (86°F) or lower.
Warm water is a risk you don't need. Cold-water washing keeps colors sharp and protects the print bond.
A common mistake is washing a brand-new printed shirt in warm water "to sanitize it." Don't. Newly printed shirts need the gentlest care while the ink fully sets.
Choosing the Best Detergent for Graphic Tees
The best detergent for graphic tees is a mild, liquid laundry detergent with no bleach and no fabric softener. Liquid formulas dissolve better in cold water than powder, which can leave residue on prints.
Fabric softener is the hidden culprit. It coats fibers and can break down the ink bond over time. Skip it for any printed shirt.
- Use: mild liquid detergent, dye-free if you can find it
- Avoid: bleach, fabric softener, and detergent pods that may not dissolve fully in cold water
- Dose: follow the label and use less than you think you need
Less detergent means less residue. Residue dulls prints and traps dirt.
How to Dry Graphic Tees Without Fading
Air-drying is how to dry graphic tees without fading. Hang the shirt or lay it flat, print side up, away from direct sun.
If you must use a dryer, choose the lowest heat setting and pull the shirt out while it's still slightly damp.
Hang drying works well for most cotton tees. Lay flat drying is better for heavier fabrics that stretch on a hanger.
How to Remove Stains From Graphic Tees
Stain removal on a graphic tee is a two-part problem: lift the stain without spreading it, and do it without damaging the print. Most stain advice ignores the second part. Scrubbing, hot water, and harsh chemicals can set a stain and wreck the ink at the same time.
The core rule: treat from the inside out, blot rather than rub, and keep chemicals off the printed area unless the product is labeled safe for the fabric.
The General Spot-Treatment Routine
- Blot excess liquid with a clean white cloth. Work from the outside of the stain inward so you do not spread it.
- Flip the shirt and run cold water through the back of the stain. This pushes the stain out the way it came in.
- Apply a small amount of mild liquid detergent directly to the spot, on the fabric side, not on the print.
- Let it sit for a few minutes, then rinse with cold water.
- Air-dry and check before washing again. Heat sets stains, so never tumble dry a stained shirt.
Stain-Specific Guidance
- Grease and oil: a drop of dish soap on the fabric side works well. Work it in gently with your fingers, not a brush, and rinse with cold water. Repeat if needed before washing.
- Ink and grass: apply a dedicated stain remover to the fabric around the print, not to the print itself. Test any product on an inside seam first and wait a few minutes to see if the fabric or ink reacts.
- Coffee, tea, and wine: blot immediately, then flush with cold water from the back. These are tannin stains that set with heat, so keep the shirt out of the dryer until the stain is gone.
What Not to Do
- Do not scrub. Scrubbing abrades the ink and can lift a heat transfer edge.
- Do not use hot water on a stain. Heat sets many stains and softens the print bond.
- Do not pour bleach or strong solvent directly on or near the print. It can strip color from both fabric and ink.
If a stain will not come out after one gentle attempt, do not escalate to harsh chemicals. Take the shirt to a professional cleaner and tell them where the print is so they can work around it.
Care by Print Method and Fabric Exceptions
Different print methods fail in different ways, so a single care routine is not enough. This is the part most guides skip, and it matters more than any single washing tip. Below is how the four most common print types respond to water, detergent, and heat, plus how to reconcile general advice with the care label and the fabric itself.
Screen Print
Screen printing pushes thick plastisol or water-based ink through a mesh and cures it with heat. The ink sits on top of the fabric, so the weak point is cracking along thick ink deposits and at the edges of large blocks of color.
- Wash: inside out, cold water, gentle cycle. The inside-out habit matters most here because the ink layer is the part that rubs.
- Dry: air-dry. A hot dryer makes plastisol brittle, and brittle ink cracks along fold lines.
- Watch for: water-based screen prints feel softer and can fade faster than plastisol; treat them with the same cold, gentle routine but expect more color loss over time.
Heat Transfer and Direct-to-Film (DTF)
Heat transfers and DTF prints are applied with a heat press, and the bond is the weak point. The edges of the transfer are where peeling starts, usually after repeated heat exposure or a hot dryer cycle.
- Wash: inside out, cold water, and a mesh bag if the print has small detailed elements. Avoid washing with heavy items that can catch an edge.
- Dry: air-dry only. This is the print type most sensitive to dryer heat; one hot cycle can lift an edge.
- Watch for: peeling at corners and edges. Once an edge lifts, it tends to spread, so stop using the dryer immediately if you see it.
Direct-to-Garment (DTG)
DTG printing sprays water-based ink directly into the fabric fibers, so the ink is part of the cloth rather than a layer on top. The weak point is fading from harsh detergent and from abrasion, not cracking.
- Wash: mild liquid detergent, cold water, gentle cycle. Skip bleach and fabric softener entirely; both attack the ink.
- Dry: air-dry, print side up, away from direct sun. DTG prints can fade with UV exposure as well as heat.
- Watch for: overall dulling rather than localized cracking. If a DTG print fades, it usually fades evenly.
Embroidery
Embroidery is thread, not ink, so the risks are snags, pilling, and thread pulls rather than cracking.
- Wash: inside out in a mesh bag on a gentle cycle. The bag keeps the needlework from catching on zippers or buttons.
- Dry: air-dry or low heat. High heat can shrink the backing and pucker the design.
- Watch for: loose threads. Trim them rather than pulling, which can unravel the stitch.
Fabric Exceptions and the Care Label
Fabric and the care label override general advice. A few common patterns:
- 100% cotton: handles cold washing well but shrinks with heat. Expect some shrinkage in a hot dryer even if the print survives.
- Cotton/polyester blends: shrink less but pill more with friction, so the mesh bag and separate load matter more than temperature alone.
- Tri-blends and rayon: drape well but stretch and distort on a hanger; dry flat rather than hanging.
A practical rule: read the care label first, then apply the print-method guidance above within whatever the label allows. If the label says warm wash and the print is a heat transfer, choose the coolest setting the label permits. The label is the ceiling; the print method tells you how far below it to stay.
Common Mistakes That Damage Prints
The fastest way to ruin a graphic tee is a hot dryer. High heat cracks ink and shrinks cotton in one cycle. It's the mistake we see most often.
Other common errors:
- Washing with heavy items. Jeans and towels rub prints raw.
- Using fabric softener. It breaks down the ink bond.
- Bleach. It strips color from the fabric and the print.
Treat every printed shirt like it's fragile for the first few washes. That habit adds years to the design.
Frequently Asked Questions
Can you put graphic tees in the washing machine?
Yes, most graphic tees can go in the washing machine, but the settings matter. Turn the shirt inside out, use cold water around 30°C, and pick a gentle or delicate cycle. Skip the dryer and hang it to air dry. Machine washing this way keeps the print intact for years, while hot water and rough cycles are what cause cracking and fading over time.
Should graphic tees be washed inside out?
Always. Turning the shirt inside out puts the fabric between the printed design and everything else in the drum. That reduces friction from other garments, zippers, and the machine itself. It is one of the simplest habits for protecting the print, and it costs you nothing extra at laundry time.
Is it okay to put graphic tees in the dryer?
It is better to avoid it. High dryer heat softens and breaks down the print, which leads to cracking and peeling. If you must use the dryer, choose the lowest heat setting and pull the shirt out while it is still slightly damp, then hang it to finish drying. Air drying is the safest option for how to dry graphic tees without fading.
How do you remove stains from a graphic tee without damaging the print?
Blot the stain, do not rub it. Apply a mild detergent or a small amount of stain remover to the fabric around the print, not directly on the design, and let it sit for a few minutes. Wash in cold water on a gentle cycle. Avoid bleach and hot water, which can set the stain and damage the print at the same time.
Your favorite surf graphic deserves better than a hot dryer and a harsh detergent. At PureSaltVibes, our Comfort Colors tees are built for everyday wear, and a little care keeps those vintage-inspired designs sharp for years. Start with cold water, a gentle cycle, and air-drying, and your PureSaltVibes shirts will stay salty and sun-faded in the best way. Browse our coastal collection and find your next everyday tee.